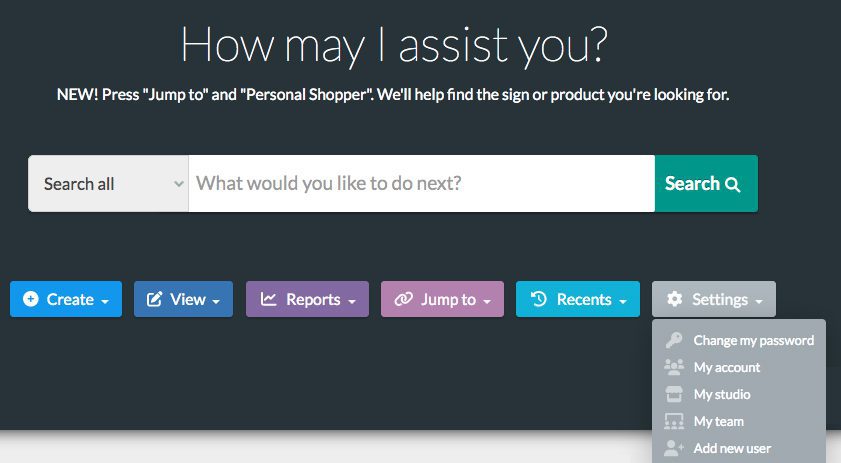
Once logged in, click the grey ‘Settings’ button, then click on ‘My account’. This will show your user details.
On the blue banner you’ll see a number of options – Details, Settings, Teams, Calendars and Badges. Click on ‘Settings’ and check that ‘Allow chat/invites?’ is activated.
2. Syncing your calendar
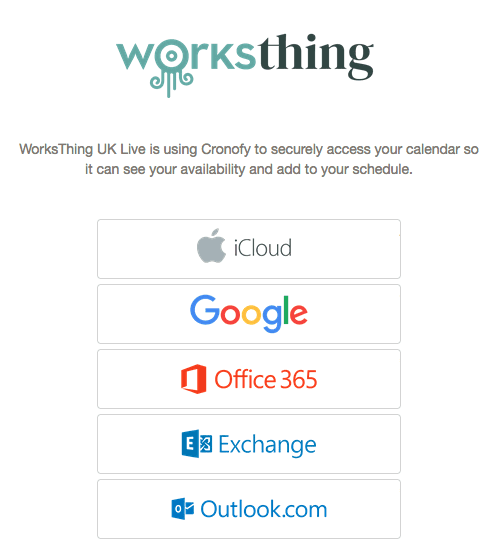
On the blue banner, click on ‘Calendars’, then ‘Link your calendar’. There are a number of different calendar accounts available to load and synchronise to your WorksThing account, including iCloud, Google and Office 365.
Pick which calendar account you would like to synchronise. Accept the terms and conditions and click ‘Link account’. If you have multiple calendar accounts, it will give you the option to pick which account you would like to set up.
Once you have chosen which account you want to link, this will open your log in page for your chosen calendar account. It may ask you to sign in.
Accept access to your account. This gives WorksThing permission to link the calendars. This can take a few minutes to load. It will eventually take you back to your user details with an added note of successfully connecting the calendar.
Go to ‘Calendars’ in the blue banner. Your account will be shown under ‘Calendar accounts’. Make sure ‘All events in my connected calendar’ is ticked.
3. Setting your availability
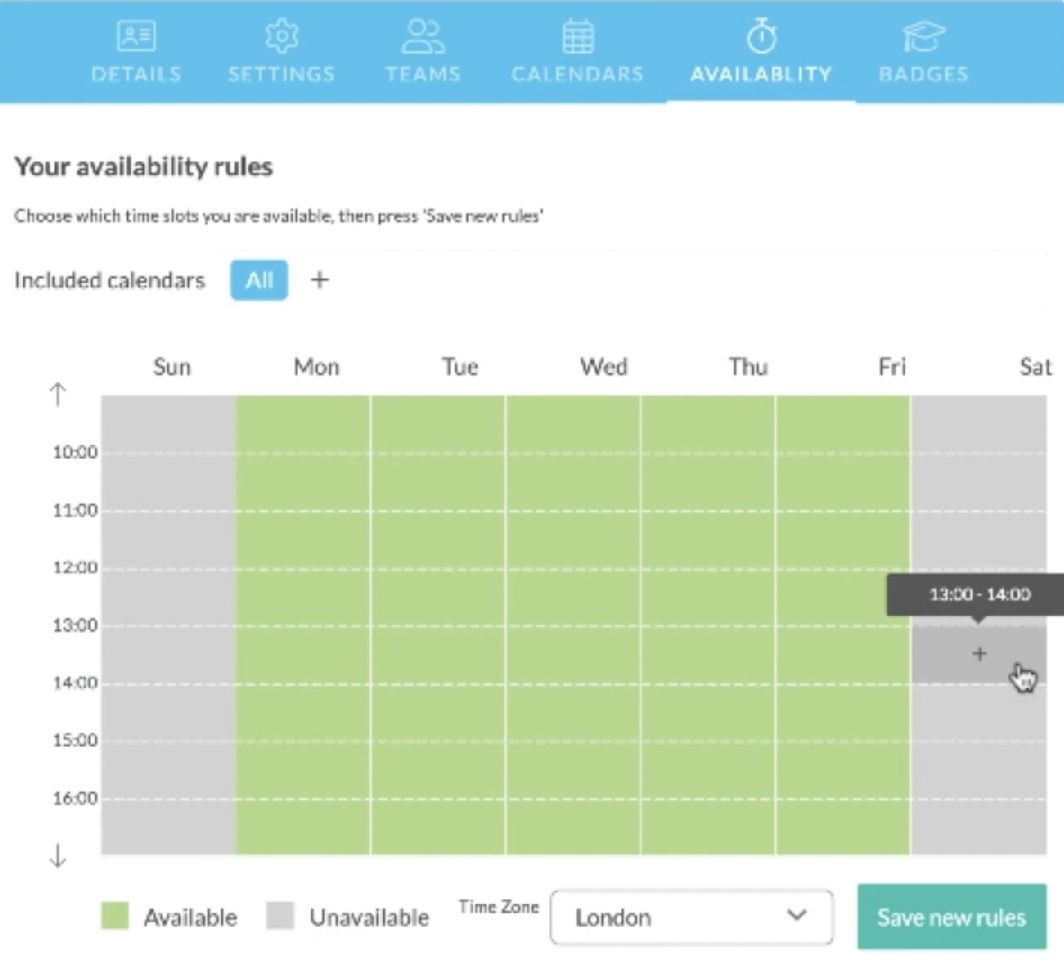
Once you have synced a calendar, you will see a new option in the blue banner called ‘Availability’. Click on the ‘Availability’ tab. You can set your availability which will allow people to book within your working hours.
Once you have set your availability, click ‘Save new rules’.
4. Setting your service area
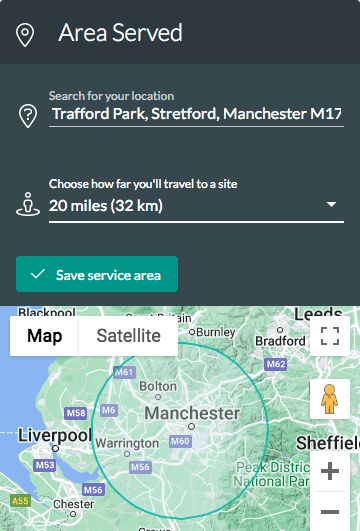
In the ‘Area Served’ box, enter a postcode, and select your chosen area. A map will then be generated and bring up the area selected. You can then choose the distance you’ll travel to a site.
It will default to ‘No service’. You can change this. Click on the drop down and select the distance.
This will also prevent people outside your service area from booking with you, and will prevent you from being assigned work as a user unless it’s within your area served.
The map will update, highlighting your service area.
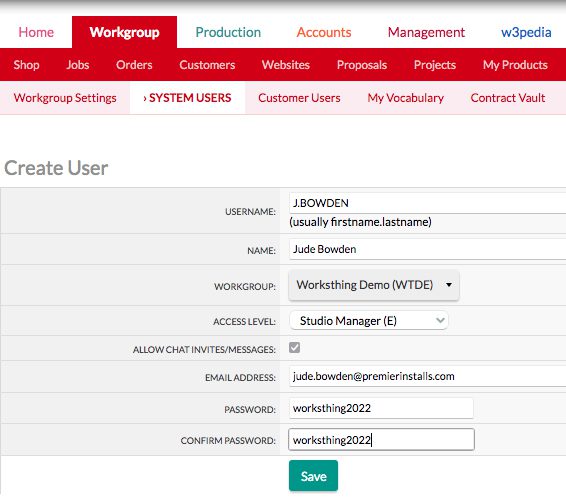
5. Creating a new user
You can continue from synchronising your calendar, but you can also access this from the dashboard. Click on the grey ‘Settings’ button at the top of the page, then click on ‘My Account’. At the bottom of the page click ‘Add a user’.
This will take you to a contact form where you can fill the details to create a new user. Fill all the details in.
For the ‘Access Level’, this is important:
Employees should be assigned: Studio Manager (E)
Contractors should be assigned: Installer or Surveyor (Y)
Anyone who does installations on your behalf should have (Y) access. This gives them a slimmed down version of WorksThing, with access to the calendar and the ability to Accept or Decline invitations for installations and surveys.
Ensure ‘Accept chat invites’ is activated, give them a password, and press ‘Save’. Once they have their log-in details, they can synchronise their calendar too.
This will also prevent people outside your service area from booking with you, and will prevent you from being assigned work as a user unless it’s within your area served.
The map will update, highlighting your service area.