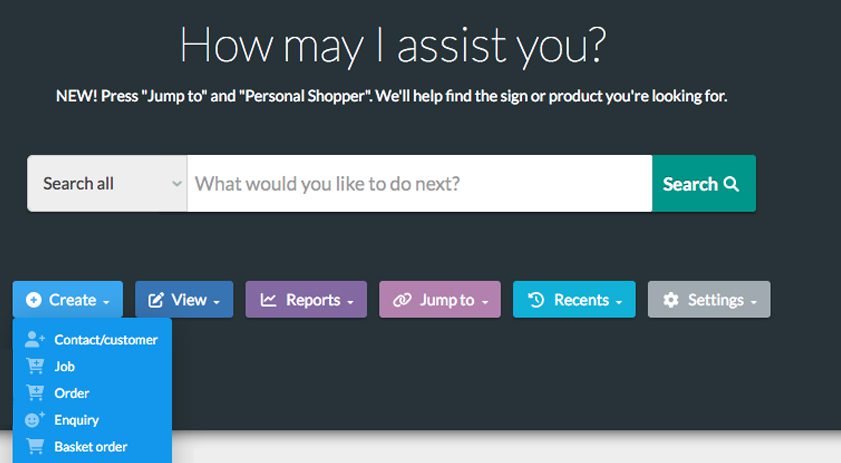
From the dashboard, there are a few different ways you can create a new customer record.
Click on ‘Create’ on the banner, then click ‘Contact/customer’. If you scroll down, you can also start from the ‘What’s next?’ section, just click on ‘Create contact’. Or, you can search for it in the search bar on the dashboard. Type ‘create’ and click on ‘Customer Create’ in the drop down list.
All three ways will take you to a blank contact form.
2. Adding a customer
Fill in the blank form with the customer’s details. Our system is linked to the Royal Mail database, so you can input a postcode and choose their address from the list provided. Check over the details and click ‘Create Contact’. You will then be directed to the ‘Main Details’ page for the customer.
Here you can add further details such as a telephone numbers.
As you scroll through the page there is extra information you can add, like additional addresses for the customer. To do this, click on ‘Add New’. This will take you to another contact form. Try to fill in all the relevant information, the more information, the better. Make sure you click ‘Save’.
Once filled in and saved, you will see a grey menu on the left. Click on ‘Main Details’ at the top, this will take you back to the customer’s main page. The information you just added will now be shown.
3. Starting a survey
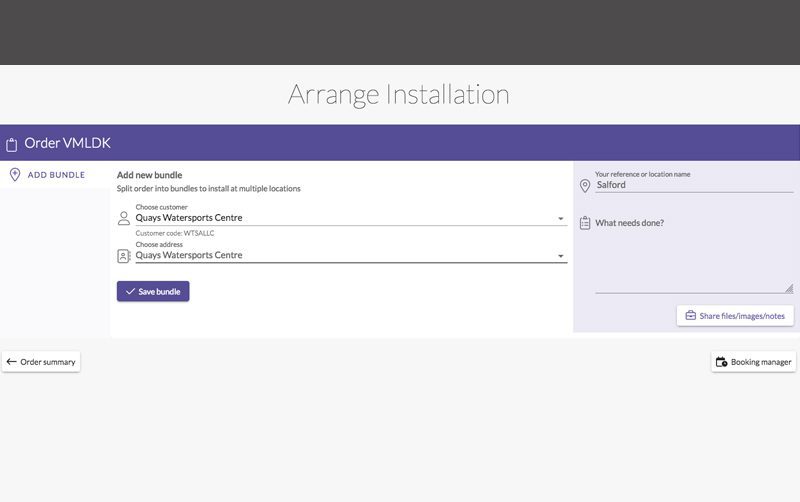
From the customer’s ‘Main Details’ page, click on ‘Survey & Install’ in the grey menu on the left hand side. This will take you to the Surveys & Installs page. Click on ‘Arrange install’.
Choose the address where the installation needs to take place (the address options here are the same addresses added into the system when you created the customer). You can then add notes for this job. Click, ‘Save bundle’. You will then be taken to an overview of the booking for that particular project bundle.
Next, click, ‘Book survey’. You can then choose the survey type, a surveyor, how long the survey will take and the travel time. You can then check the availability and confirm all the details. When you click confirm, the installer will be notified, and they can confirm or decline the job.
Once the installer has responded, it will show up on the overview. If the installer has set their calendar up, the job will show up in their linked calendar. Once you have selected a date and time for the survey, click ‘Confirm’. This will notify the surveyor, they can then accept or decline the booking. Once accepted, it will show up on the booking overview.